

Installation and site support
Our team installs EzyBuild mouldings, columns and heritage details on projects across Sydney. If your own trades are installing, our site installation manual and project assistance cover every step.
How our team installs
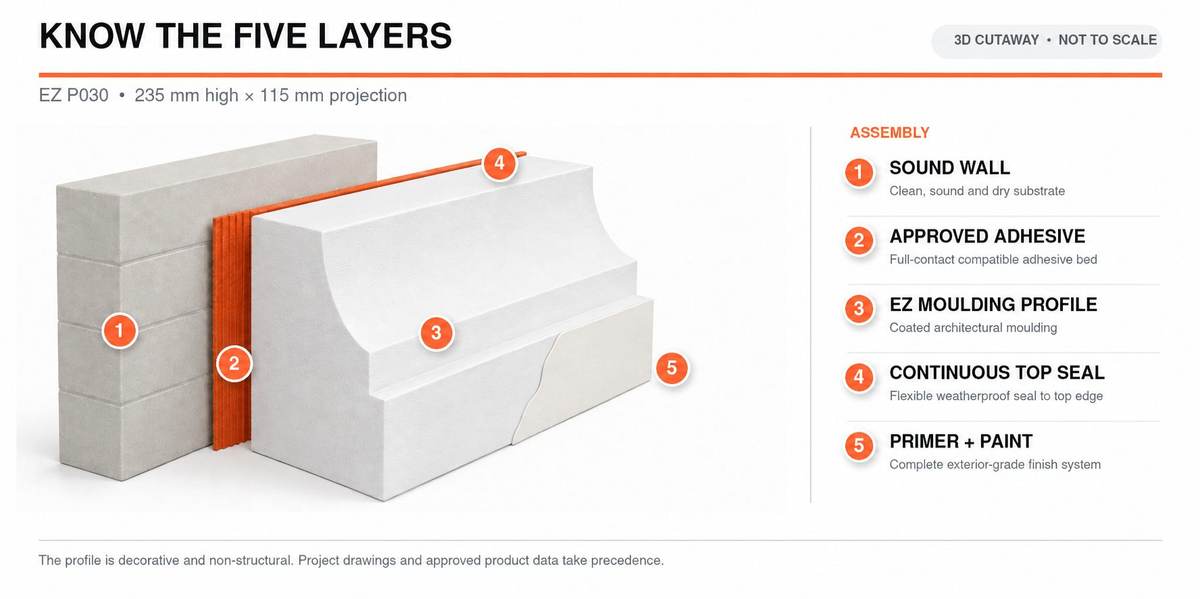
Check the substrate
Sound, clean, dry and cured. Confirm profile, quantity and critical dimensions before cutting.
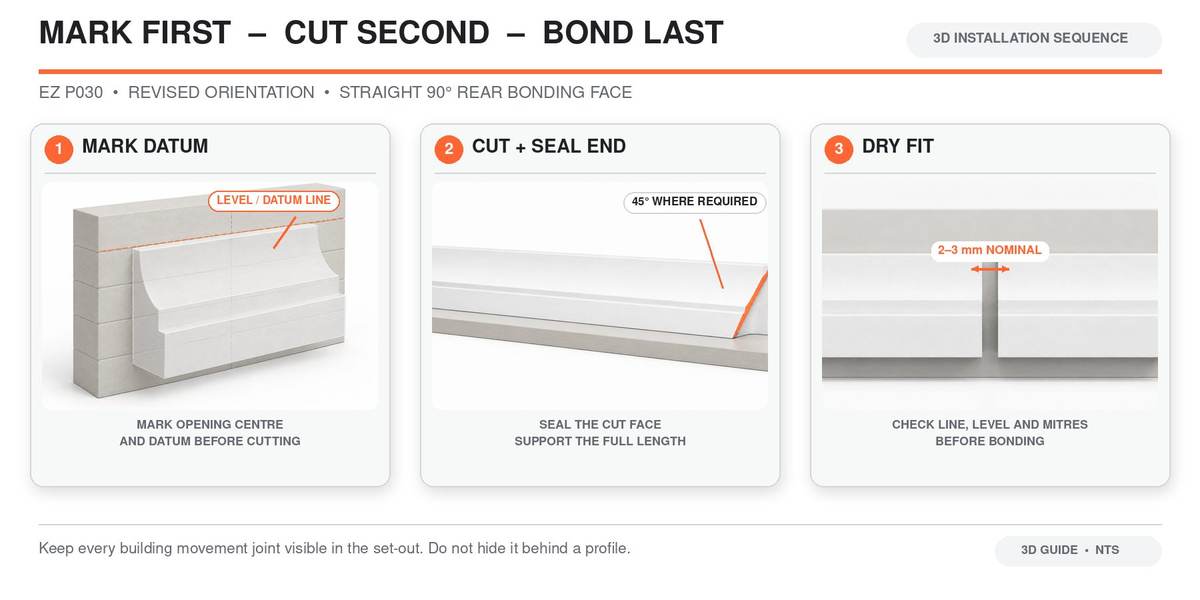
Mark first, cut second
Mark the design line and levels, plan joints away from corners, then dry-fit before any adhesive.
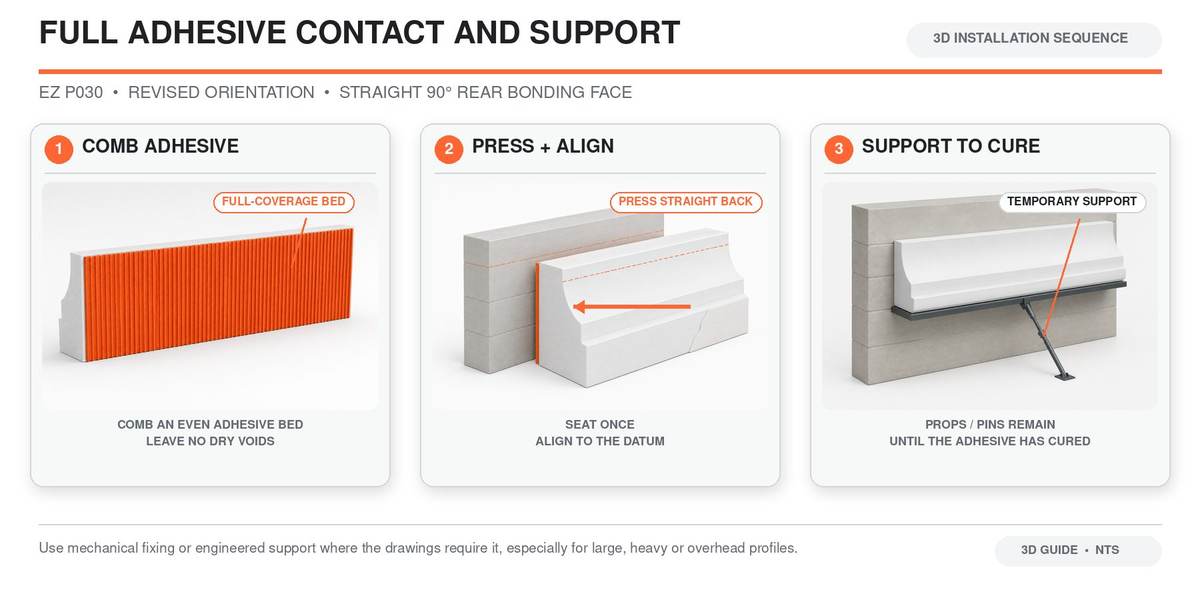
Full adhesive contact
Comb an even adhesive bed, press and align once, and support the profile until fully cured.
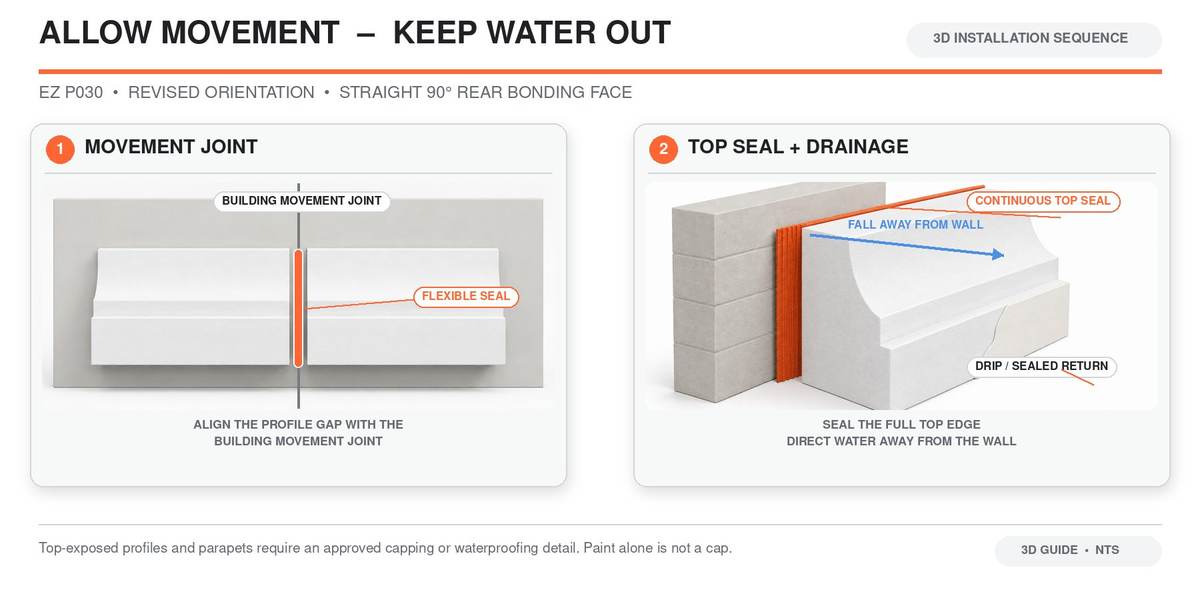
Keep movement joints open
Carry substrate movement joints through the profile. Allow a movement break at least every 4.8 m.
Keep water out
Seal top edges, give sills a fall and drip edge, and cap exposed tops. Paint alone is not a cap.
Prime and paint within 5 days
Seal and paint every exposed surface, including cut ends, joints, returns and top faces.
Installing with your own trades? Follow the full installation manual and project drawings.
Installation diagrams
Need help on site?
Call 02 9725 5766 or email sales@ezybuild.com.au for project assistance.